
 German
 French
Feeding horses according to their needs requires a well-chosen relationship between feeding times and feeding breaks. This requires a lot of time and attention. Automatic, time-controlled feeding offers support in this regard.
Read here how you can build a time-controlled hayrack yourself with little effort. We have deliberately chosen a corner hay rack for this tutorial, as we receive a lot of requests from horse owners and boarding stable operators who are looking for a space-saving solution for boxes or shelters. However, with minor modifications, a rectangular box can of course also be built, or a box can be built at a right angle. The sizes given are only a suggestion. Of course, a bucket of concentrated feed or similar can also be placed in the crate.
You will spend less time on feeding and the horse will thank you with its health and satisfaction.
What do you need?
- 2 Planks
- 3 battens
- 3 hinges
- 1 Tima automatic
- Screws
- Jigsaw
- Cordless screwdriver
- Bits
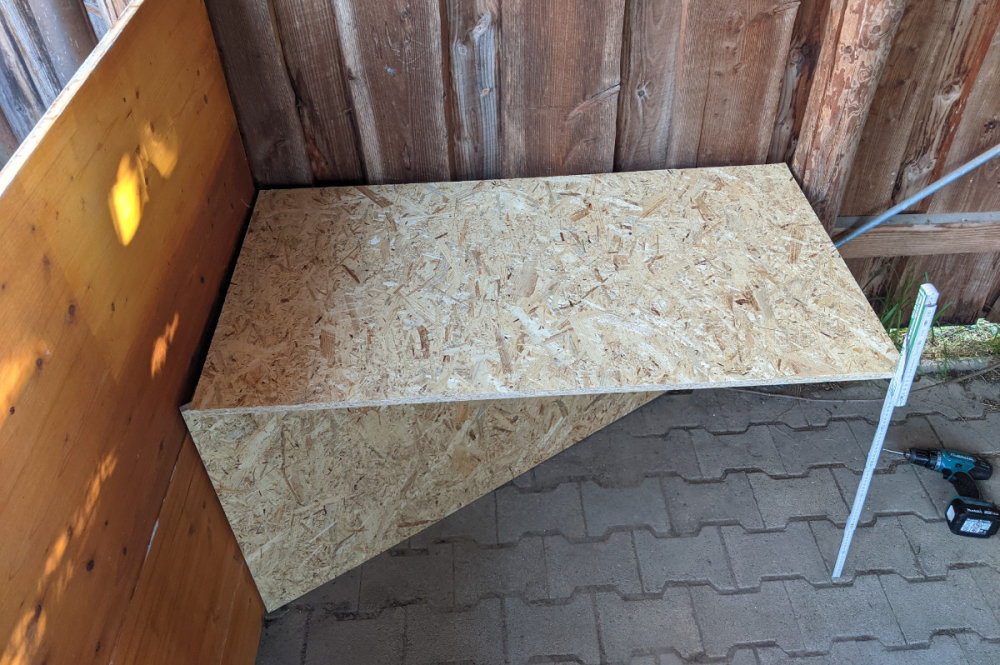
The boards are for the front and the lid of the rack. Multi-layered wood (multiplex, screen printed) or OSB boards are well suited. Glued wood boards are not suitable. The board thickness should be between 15 and 22 mm. The size of the boards refers to the amount of hay you want to store in the box.
|
Hay |
Planks Length |
Planks Width |
|
6kg |
120 cm |
60 cm |
|
10kg |
140 cm |
70 cm |
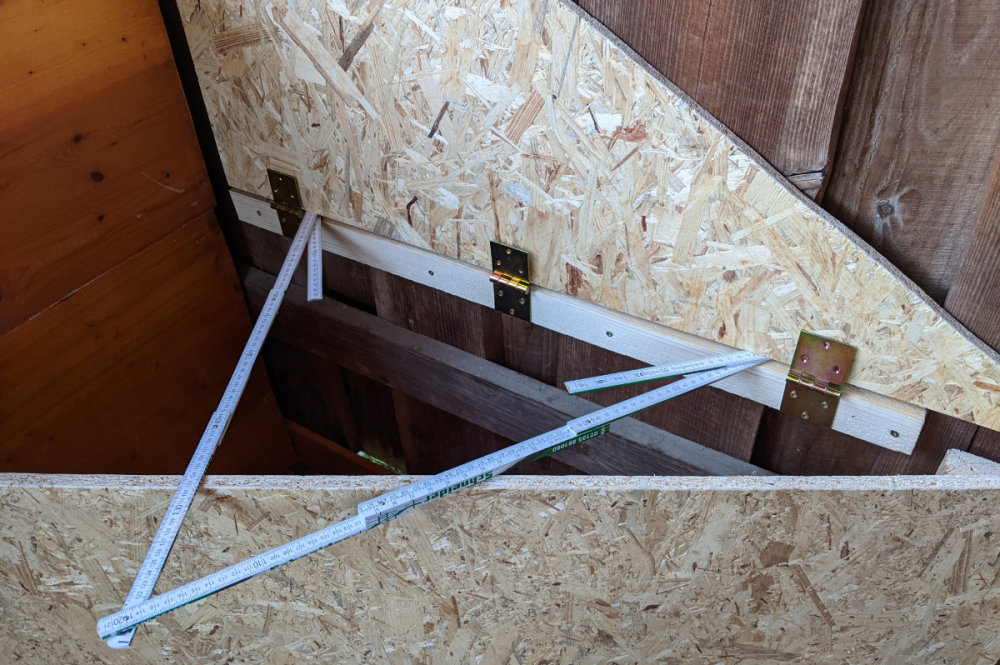
Battens
Typical roof battens with dimensions of 30x50mm or 40x60mm are suitable as battens. You need 2 battens with a length as wide as the board and one batten approx. 85cm long.
Hinges

Please use only inseparable hinges. Choose the dimensions so that they fit well on the wide side of the roof batten. The sheet thickness should not be less than 1.5 mm
Tíma Automatic
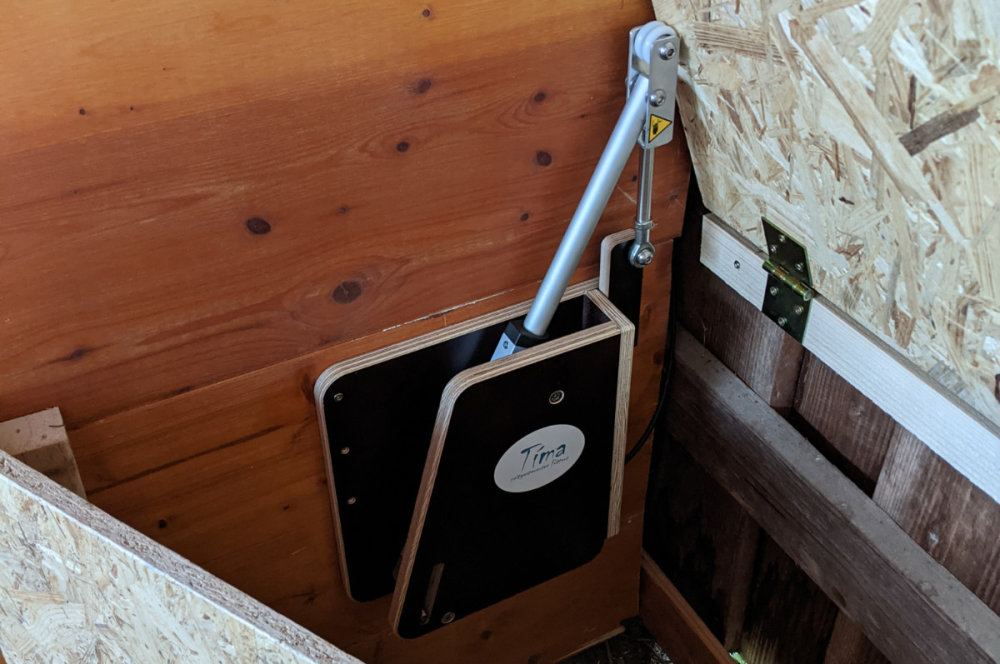
The Tíma Automatic is an attachment that was specially developed for time-controlled feeding of horses. Feeding times can be set individually on a timer. A lifting cylinder opens and closes the lid. Safe and reliable. You can find more information about the Tima here.
Assembly
The assembly is basically as shown in the pictures.
Attach the two short slats to the wall and screw the board to them. The dimensions refer to the rack for 6 kg of hay, the dimensions in brackets refer to the rack for 10 kg of hay.

Screw the hinges onto the approx. 85 cm long roof batten. See also the picture in the chapter "Hinges". The distance between the hinges should be approx. 30 cm.
Then attach the batten to the wall with the hinges at the height of the front panel.

Place the second board on top. Leave enough space between it and the wall so that it can later move as a lid. Now mark the projection of the lid from below with a pencil and saw it off with a jigsaw.
Open the lid and place it on the rear roof batten with a distance of approx. 1 cm (place spacers underneath). Then screw the hinges to the lid.
The installation of the Tíma automatic is done in a few steps and described in its operating instructions. The lifting cylinder for the Tíma Automatic is also available for the other side, so that the rake can also be built in a right-hand corner. Please contact us.

-for-horses.webp)


